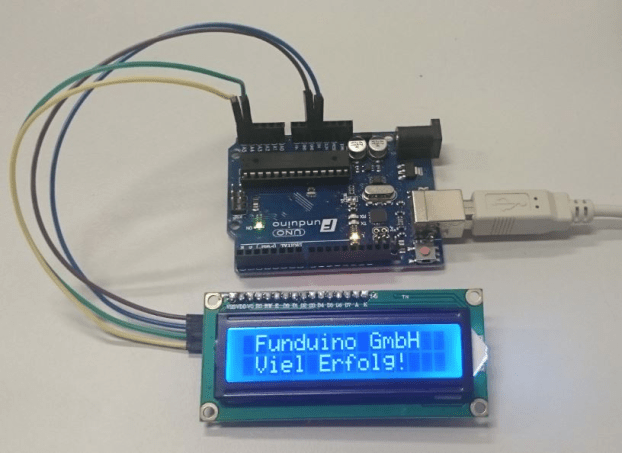
Task: Show a text on an I²C LCD Module.
Required equipment: microcontroller (in this example UNO R3), LCD with I²C module, cables
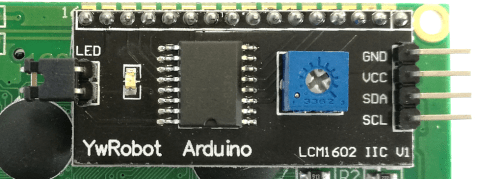
The LCD module with the already soldered on i²C module , makes it possible to use an LCD without the complicated wiring. This can be useful for more complex projects. Another difference to the simple LCD is, that the module on the back of the LCD, already has got a knob for the adjusting of the back light.
Attention: This tutorial only works for I²C modules without solder pads (A0,A1,A2).
Your display has to look like this:
If your display version has solder pads on the back, please see our tutorial “Running two I²C displays at the same time”
Wiring:
The connection of the I²C LCD is very simple. The module has only four contacts.
GND gets connected to GND on the Arduino, VCC to 5V on the Arduino, SDA with the analog Input A4 and SCL to the analog Input A5.
LCD >> UNO
GND >> GND
VCC >> 5V
SDA >> A4
SCL >> A5
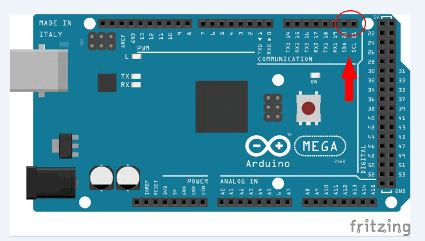
Attention!: The MEGA2560 microcontroller has its own SDA and SCL pins. You can find them on pin 20 and pin 21.
Programing:
We will need another library to work with the I²C LCD, which isn’t already installed in the arduino software. You can download the zip for example here: https://github.com/fdebrabander/Arduino-LiquidCrystal-I2C-library .
After you have downloaded the library you have to add it to the arduino software.
You can easily do this at the arduino software at “Sketch” then “Include Library” and “add .ZIP Library..”. Now you can use the library while writing a sketch.
Code:
#include <Wire.h> //Include Wire library
#include <LiquidCrystal_I2C.h>//Include the previous downloaded LiquidCrystal_I2C library
LiquidCrystal_I2C lcd(0x27, 16, 2); //Here we are going to define what kind of display we are using. In //this case it is one with 16 signs and 2 rows.
void setup()
{
lcd.begin(); //In the setup part we are starting the LCD (without anything inside the brackets, because we //defined the LCD already).
}
void loop()
{
lcd.setCursor(0,0); //At the loop part the I²C LCD is programed just like the simple LED
lcd.print(„Funduino GmbH„);
lcd.setCursor(0,1); // lcd.setCursor to define sign and row where the text //should start
lcd.print(„Good Luck!„); // lcd.print to show text on the LCD
}
Extension:
Just like with the simple LCD, you can show the result of measurements on the I²C LCD.
Example code (moisture sensor gets connected to pin A0):
#include <Wire.h>
#include <LiquidCrystal_I2C.h>
LiquidCrystal_I2C lcd(0x27, 16, 2);
int measurement=0;
void setup()
{
lcd.begin();
}
void loop()
{
measurement=analogRead(A0); //The value on A0 gets read out and saved under “measurement”
lcd.setCursor(0,0); //”Measurement:” is shown in the first row
lcd.print(„Measurement:„);
lcd.setCursor(0,1); //In the second row we want to show the read out value of the moisture sensor
lcd.print(measurement);
delay(500);
}