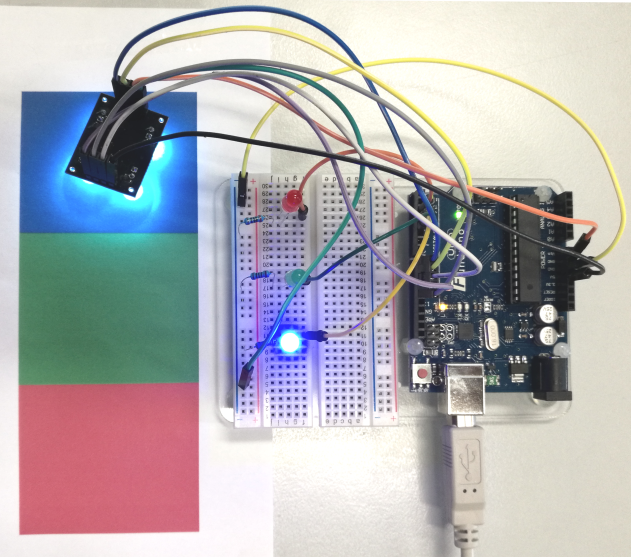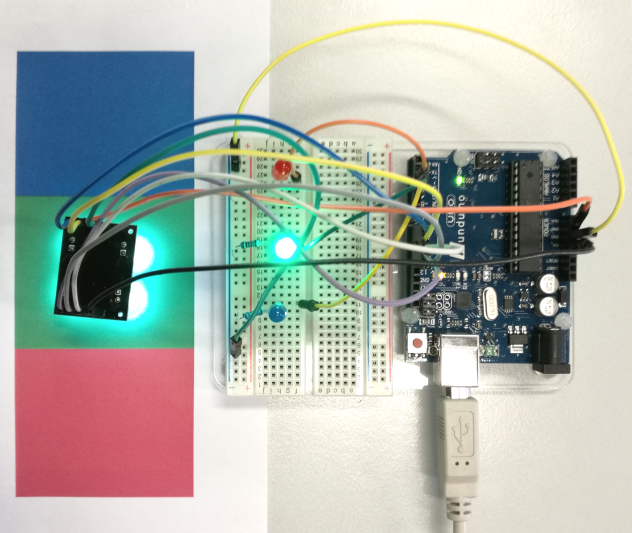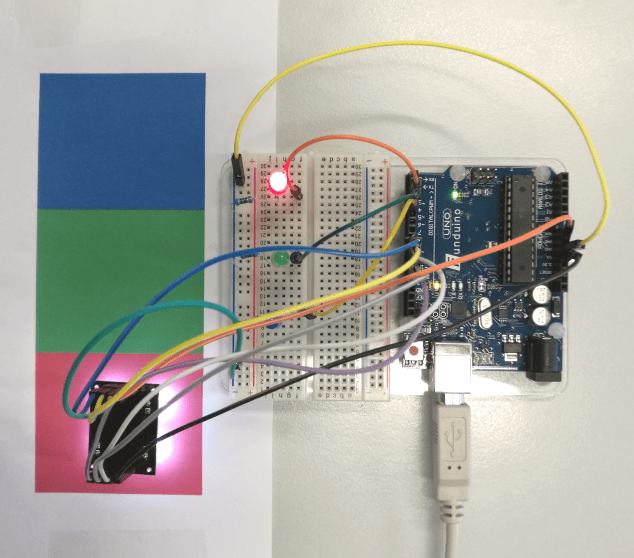
Task: We want to detect the colours red green and blue and let a matching LED light up.
Required equipment: Arduino / cables / colour sensor / red LED / green LED / blue LED / resistor for the LEDs
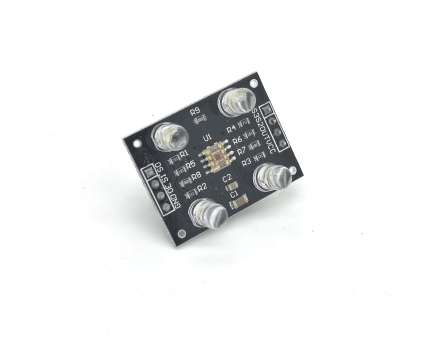
On the front of the sensor four white LEDs are placed. These LEDs have the purpose to get more accurate values. In the center of those four LEDs there is a small square out of photodiodes, that are able to filter the intensity of a colour. There are diodes especially for red colours, green colours, blue colours and some diodes without any filter. All together this diodes are able to recognize a certain colour. The sensor converts this into a value that the Arduino is able to read.
Wiring:

Code:
const int s0 = 8; //connection with the colour sensor
const int s1 = 9;
const int s2 = 12;
const int s3 = 11;
const int out = 10;
int redLED = 2; //connection with the LEDs
int greenLED = 3;
int blueLED = 4;
int red = 0; //variables for the LEDs
int green = 0;
int blue = 0;
void setup()
{
Serial.begin(9600); //start serial connection
pinMode(s0, OUTPUT); //the contacts from the sensor are defined as output
pinMode(s1, OUTPUT); //or input
pinMode(s2, OUTPUT);
pinMode(s3, OUTPUT);
pinMode(out, INPUT);
pinMode(redLED, OUTPUT); //LEDs are defined as output
pinMode(greenLED, OUTPUT);
pinMode(blueLED, OUTPUT);
digitalWrite(s0, HIGH); //start the four white LEDs on the sensor
digitalWrite(s1, HIGH);
}
void loop()
{
color();//This function is defined in the end of the code(s.“void color();“)
Serial.print(“ Value red: „); //the values from the colours are displayed on
Serial.print(red, DEC); //the serial monitor
Serial.print(“ Value green: „);
Serial.print(green, DEC);
Serial.print(“ Value blue: „);
Serial.print(blue, DEC);
//now the commands for the LEDs
if (red < blue && red < green && red < 20)
{
Serial.println(“ – (red colour)“);
digitalWrite(redLED, HIGH);
digitalWrite(greenLED, LOW);
digitalWrite(blueLED, LOW);
}
else if (blue < red && blue < green)
{
Serial.println(“ – (blue colour)“);
digitalWrite(redLED, LOW);
digitalWrite(greenLED, LOW);
digitalWrite(blueLED, HIGH);
}
else if (green < red && green < blue)
{
Serial.println(“ – (green colour)“);
digitalWrite(redLED, LOW);
digitalWrite(greenLED, HIGH);
digitalWrite(blueLED, LOW);
}
else{ //If no values are measured..
Serial.println(); //nothing is shown on the serial monitor
}
delay(300);
digitalWrite(redLED, LOW); //..and all LEDs are turned off
digitalWrite(greenLED, LOW);
digitalWrite(blueLED, LOW);
}
void color() //This is the color function where all values are read out and
//saved with the variables
{
digitalWrite(s2, LOW);
digitalWrite(s3, LOW);
red = pulseIn(out, digitalRead(out) == HIGH ? LOW : HIGH);
digitalWrite(s3, HIGH);
blue = pulseIn(out, digitalRead(out) == HIGH ? LOW : HIGH);
digitalWrite(s2, HIGH);
green = pulseIn(out, digitalRead(out) == HIGH ? LOW : HIGH);
}
You can check the function by printing this picture and holding each colour in front of the sensor.

Depending on the colour the sensor detects the matching LEDs should light up: