Task: A LED and a piezo speaker are supposed to blink or beep continuously.
Required equipment: Microcontroller / one LED / resistor with 200 Ohm / Breadboard / piezo speaker / cables
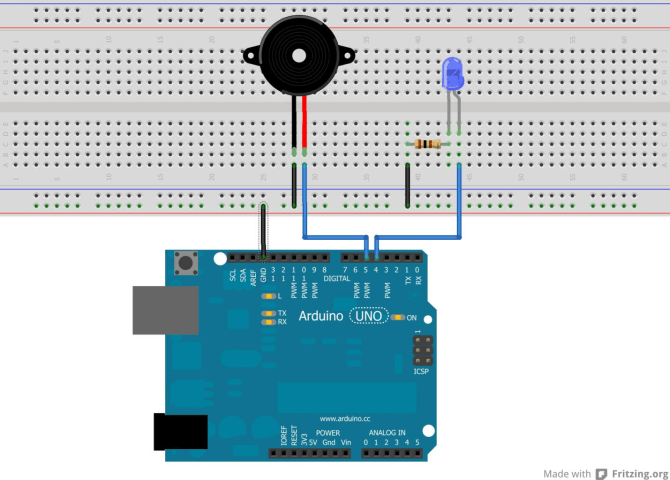
Setup:
This tutorial is an example of how easy you can create a simple lock with just a few arduino parts.
Code:
int LED=4;//this time we also going to use the first part of the program. Here we are going to put in //variables. This means that there will be a letter or a word standing for a number. In this example the //LED is connected to pin 4 and the speaker to pin 5, so we rename pin 4 and pin 5, to avoid confusion. The //word “LED” now stands for the number 4 and the word “beep” for the number 5.
int beep=5;
void setup()
{ //We are starting with the setup
pinMode(LED, OUTPUT); //pin 4 (pin “LED”) is supposed to be an output
pinMode(beep, OUTPUT); //Pin 5 (pin “beep”) is supposed to be an output
}
void loop()
{ //The main part starts
digitalWrite(LED, HIGH); //turn on the LED
digitalWrite(beep, HIGH); //turn on the speaker
delay(1000); //wait for 1000 milliseconds (sound and light)
digitalWrite(LED, LOW); //turn off the LED
digitalWrite(beep, LOW); //turn off the speaker
delay(1000); //wait for 1000 milliseconds (no sound and no light)
} //Here at the end of the loop the program starts again from the beginning of the loop. So it will beep //and light up again. If you change the break (delay) it will be either beep and light up faster or slower.